



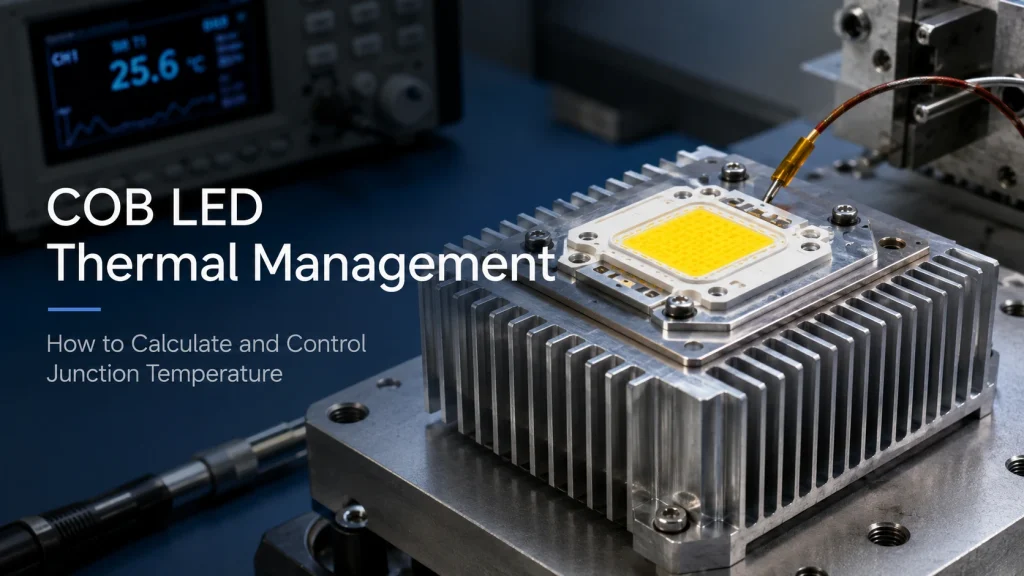
Effective COB LED thermal management starts with one question: what junction temperature will the LED actually reach under real operating conditions? A large heatsink alone does not answer that question. In a high power light engine, heat must move from the LED junction through the substrate, thermal interface material, mounting surface, heatsink, enclosure, and finally into the surrounding air.
Junction temperature can rise even when the heatsink seems only fairly warm, if any portion of that thermal path imposes too much resistance. Engineers, OEM equipment manufacturers, and technical buyers thus have the practical goal of computing the expected thermal margin, verifying it inside the final housing, and correcting the weakest link in the thermal path before production.
COB LED Junction Temperature: What Engineers Actually Need to Control
Junction temperature, usually written as Tj, is the temperature inside the semiconductor junction where electrical energy is converted into light and heat. It is not the same as the temperature measured on the heatsink or enclosure.
Tj vs Tc vs Ambient Temperature: Which Number Matters?
Tj is normally the most important thermal limit, but it is rarely measured directly in an assembled product. Instead, manufacturers usually define a case or sensor reference point, often called Tc or Ts, that engineers can measure and use together with the specified thermal resistance.
Ambient temperature, Ta, is the temperature of the surrounding environment. It determines how much temperature rise the entire thermal system can tolerate.
This distinction matters during testing. A heatsink fin reading, enclosure temperature, or infrared camera image should not automatically be treated as junction temperature. Engineers should identify the manufacturer defined reference point and confirm the thermal resistance definition in the specific COB datasheet before using any calculation.
Why High Power COB LEDs Create a Concentrated Thermal Load
High power COB LEDs can place substantial heat into a relatively compact source area. The system therefore needs a low resistance path from junction to ambient.
The key path is:
junction → substrate → thermal interface → heatsink → enclosure or airflow → ambient.
A strong heatsink cannot compensate for every upstream problem. Poor contact, excessive interface thickness, uneven mounting pressure, inadequate substrate to heatsink contact, or restricted airflow can each increase operating temperature.
This is why junction temperature control should be considered as part of the overall LED light engine design, not as a separate accessory added after the optical and electrical design is complete.
How to Calculate COB LED Junction Temperature
A useful junction temperature calculation requires correct input data. Generic formulas can be misleading if the thermal reference points are not defined the same way by the LED manufacturer.
Identify Tc, Thermal Resistance, and the Correct Power Term
Start by finding the thermal resistance specified for the COB, such as junction to case or junction to sensor thermal resistance. Then identify the exact case or sensor measurement point defined in the documentation.
A simplified engineering relationship often takes the form of:
Tj ≈ Tc + thermal power × junction-to-case thermal resistance
However, the correct thermal power term and thermal resistance definition should be taken from the specific product documentation. Electrical input power should not automatically be treated as heat without considering the manufacturer’s calculation method.
The sourcing team should therefore ask for thermal resistance data, measurement point guidance, and operating conditions when these are not clearly included in the product specification.
Calculate Thermal Margin Instead of Designing to TjMax
Maximum junction temperature should be treated as a limit, not a preferred operating target.
A more robust design compares the expected operating Tj with the product limit and preserves thermal headroom for changes in ambient temperature, airflow, interface condition, manufacturing tolerance, and long term contamination.
This is especially important for sealed equipment, continuous duty light engines, and products that may operate in elevated ambient temperatures.
During prototype validation, the measured stabilized Tc should be fed back into the thermal calculation. If the calculated junction temperature leaves very little margin, the engineer should improve the thermal path or reduce the thermal load rather than assume the product will remain acceptable in every operating condition.
How to Size a Heatsink for a High Power COB LED
A COB LED heatsink should be selected from the thermal budget, not simply from a seller’s wattage label.
Build a Junction to Ambient Thermal Resistance Budget
The available temperature rise is the difference between the allowable junction temperature and the worst case ambient temperature. That total rise must accommodate every part of the thermal path.
The thermal budget may include:
- Junctionto case resistance
- Caseto heatsink interface resistance
- Heatsinkto ambient resistance
- Additional restrictions caused by enclosure design or airflow
Once the upstream thermal resistances are accounted for, the remaining budget determines how much thermal resistance the heatsink can have.
This approach is more useful than asking for a “200W heatsink” because heatsink performance depends on orientation, airflow, surrounding temperature, enclosure geometry, and test conditions.
Passive vs Active Cooling: When the Thermal Budget No Longer Closes
Passive cooling is attractive because it avoids moving parts, but it is only suitable when the required heatsink to ambient thermal resistance can be achieved within the available size and airflow conditions.
Active cooling may be worth evaluating when a practical passive heatsink cannot keep the calculated junction temperature within the required margin. Fans can improve convective heat transfer, but they also introduce additional considerations such as dust, noise, maintenance, airflow blockage, and fan failure.
The decision should therefore come from the thermal budget and final enclosure test, not from COB wattage alone.
TIM, Mounting, and Contact Surface: Where Thermal Designs Fail
A large heatsink can still perform poorly if the interface between the COB and heatsink is badly designed.
Thermal Grease, Pads, and Interface Thickness
Thermal interface material fills microscopic gaps between mating surfaces. Its role is to reduce interface resistance, not to create a thick layer between components.
Excessive grease, thick pads, trapped air, or uneven application can increase the thermal path instead of improving it. The appropriate TIM type and thickness depend on the mechanical interface and should be checked against the relevant COB and assembly recommendations.
During prototype testing, engineers should validate the installed configuration rather than assuming the datasheet thermal performance will automatically transfer to a different interface material or mounting method.
Flatness and Mounting Pressure Can Defeat a Good Heatsink
Good thermal contact depends on surface flatness, clean mating surfaces, correct mounting pressure, and even mechanical loading.
Overtightening fasteners is not a reliable thermal fix. It may create uneven stress or damage the substrate. Too little pressure can leave gaps and reduce heat transfer.
When a COB runs hotter than expected, the interface should therefore be inspected before replacing the heatsink. Mounting quality is one of the easiest thermal variables to overlook during the transition from prototype to production.
Why a COB LED Still Overheats With a Large Heatsink
Overheating does not necessarily mean the COB itself is defective.
Check Drive Current, Ambient Temperature, and Enclosure Conditions
Excessive current increases electrical input and thermal load. A system that performs correctly on an open bench may also run significantly hotter inside a compact housing with restricted airflow.
Engineers should verify the actual operating current, ambient temperature, duty cycle, enclosure ventilation, and heatsink temperature rise under realistic conditions.
If the thermal path appears adequate but the COB still runs too hot, the electrical operating point should also be checked. The existing high power COB LED driver selection guide covers current, voltage, protection, and driver related operating considerations in more detail.
Diagnose the Thermal Path Before Replacing the COB
A practical troubleshooting sequence is:
- Verify actual current and power.
- Measure Tc at the correct reference point.
- Inspect TIM and mounting contact.
- Check heatsink temperature rise.
- Confirm airflow and enclosure conditions.
- Recalculate the thermal budget.
- Consider COB replacement only after the system causes have been reviewed.
This prevents maintenance teams from installing a new light source into the same inadequate thermal environment.
How to Measure and Validate COB LED Temperature
Calculation is necessary, but final approval should be based on measurement.
Measure Tc at the Manufacturer-Defined Reference Point
The case temperature measurement point should come from the product documentation. A thermocouple is commonly used for this type of engineering validation, but measurement method and placement should be consistent and repeatable.
Measuring at a convenient point on the heatsink may underestimate the temperature at the defined COB reference location. That error can then produce an incorrect junction temperature estimate.
The same measurement method should be used when comparing prototypes or evaluating a replacement source.
Validate After Thermal Stabilization in the Final Housing
Thermal testing should continue until temperature has stabilized rather than stopping after a few minutes.
The test should use the intended driver, production representative TIM and mounting, realistic duty cycle, and the final or representative enclosure. Worst case ambient conditions should also be considered where practical.
This is particularly important in equipment where internal heat from other electronics can raise the local ambient temperature around the COB.
When to Use Temperature Monitoring in a High Power COB Light Engine
Temperature monitoring can add useful protection or diagnostic information when operating conditions vary significantly.
Use Monitoring When Thermal Conditions Can Change During Operation
An NTC thermistor or other temperature sensor may be worth considering in high power, enclosed, fan cooled, or variable ambient systems.
The sensor should not be treated as a substitute for proper thermal design. Its purpose is to provide information that can support protection, control, or fault detection if temperature rises unexpectedly.
IHYLight publicly offers high power COB customization options that can include additional integrated components in suitable designs. Temperature sensing requirements, sensor position, and control logic should still be defined for the specific project rather than assumed to be standard.
How OEM Buyers Should Specify Thermal Requirements in a COB LED RFQ
A useful COB RFQ should describe the system, not just the desired wattage.
Thermal Data to Send the Supplier
Useful information includes:
- Existing COB or module model
- Operating voltage and current
- Required optical output
- COB or substrate dimensions
- Maximum ambient temperature
- Duty cycle
- Enclosure dimensions
- Available heatsink space
- Cooling method
- Thermal limits, if defined
- Temperaturemonitoring requirements
- Drawings or samples
- Expected prototype and production quantities
IHYLight’s high power COB LED modules provide a commercial reference for OEM projects where substrate, power, dimensions, and thermal integration need to be considered together.
What to Verify Before Approving a High Power COB Sample
Before sample approval, verify that testing uses the intended driver, mounting method, TIM, heatsink, enclosure, and operating environment. Measure stabilized case temperature and compare the resulting thermal margin with the design target.
This step helps prevent a common production problem: a sample that performs well during open bench testing but overheats after installation into the finished equipment.
Conclusion
COB LED thermal management is ultimately about controlling junction temperature through the complete thermal path. Engineers should calculate thermal margin from manufacturer defined data, size the heatsink from an actual resistance budget, control TIM and mounting quality, and validate stabilized temperature inside the final housing.
For OEM projects involving high power COB replacement, redesign, or a new light engine, IHYLight can be evaluated against those same requirements. Project teams can discuss a high power COB LED project by providing the existing model, operating current and voltage, dimensions, drawings, ambient conditions, cooling method, enclosure information, target quantity, application, or photos of an overheating installation.
FAQs
How do you calculate COB LED junction temperature?
Use the manufacturer defined case or sensor temperature together with the specified thermal resistance and the correct thermal power term. The exact equation and reference point should follow the COB datasheet.
What is the difference between Tj and Tc in a COB LED?
Tj is the semiconductor junction temperature. Tc is a manufacturer defined case or reference temperature that can usually be measured and used to estimate junction conditions.
Why does my COB LED overheat even with a heatsink?
Possible causes include excessive drive current, inadequate heatsink thermal resistance, poor TIM contact, uneven mounting, high ambient temperature, restricted airflow, or a closed enclosure.
How do I know if my COB LED heatsink is large enough?
Calculate the allowable junction to ambient thermal resistance and determine how much of that budget remains for the heatsink. Then validate the design by measuring stabilized case temperature in the real housing.
Does a high power COB LED need active cooling?
Not necessarily. Active cooling should be considered when passive cooling cannot meet the required thermal resistance within the available size, ambient temperature, enclosure, and duty cycle limits.